All issues related with generator are collected in Error Logger place. As System Administrator open ‘Error Logs’ tab.
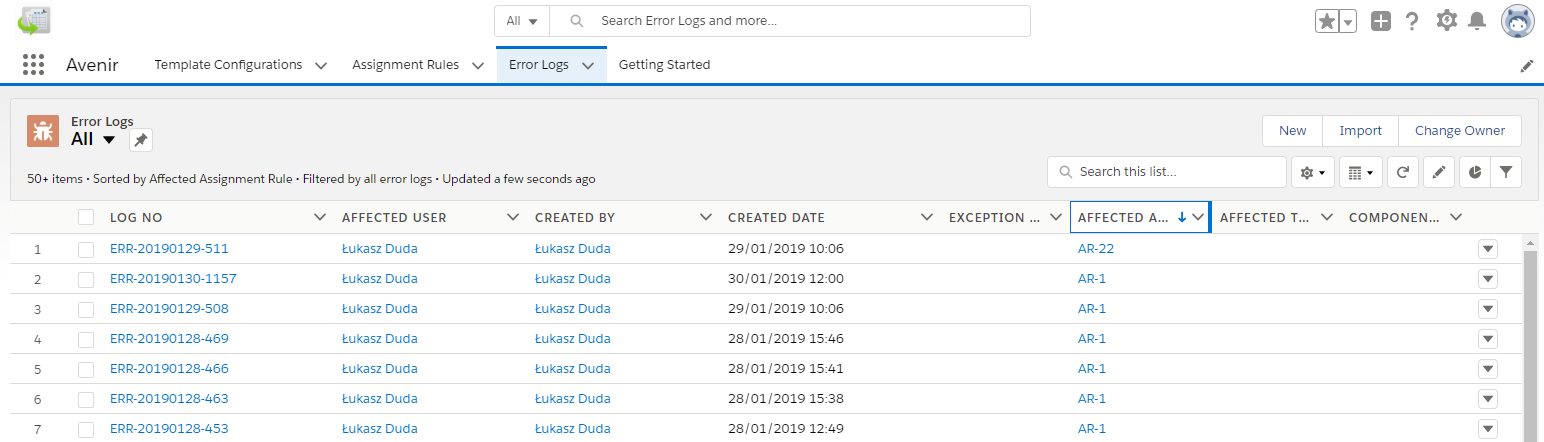
The table shows all necessary inormations about errors generated by Avenir application.
| Field | Field Description |
|---|---|
| Affected Assignment Rule | Keeps Id of affected Assignment Rule, where error occured. |
| Affected Template Configuration | Keeps Id of Affected Template Configuration, where error occured. |
| Affected User | Keeps Id of Affected User who runs the error. |
| Component Name | Keeps Component Name, where error occured. |
| Exception Cause | Specify exception cause from Exception.getCause() |
| Exception Line Number | Specify exception line number from Exception.getLineNumber() |
| Exception Stack Trace | Specify exception stack trace from Exception.getStackTraceString() |
| Message | Specify exception message from Exception.getMessage() |
| Timestamp | Specify time when error occured. |
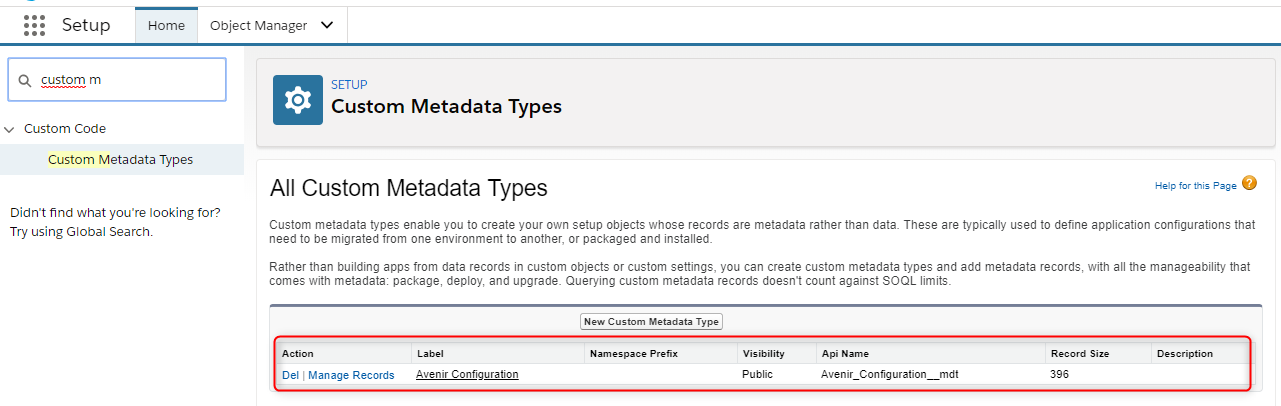
Error Logs can be cleared periodically by cleaner batch. This period can be defined in Custom Metadata.
As System Administrator goes to Setup → Custom Code → Custom Metadata Types. Click ‘Manage Records’ next to Avenir Configuration.
Edit ‘Log Expiration (in days)’ and set appropriate Value.
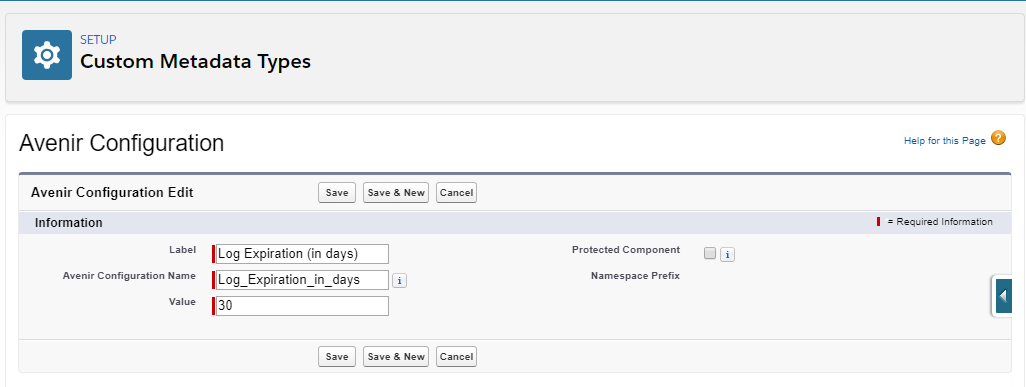
Click ‘Save’.
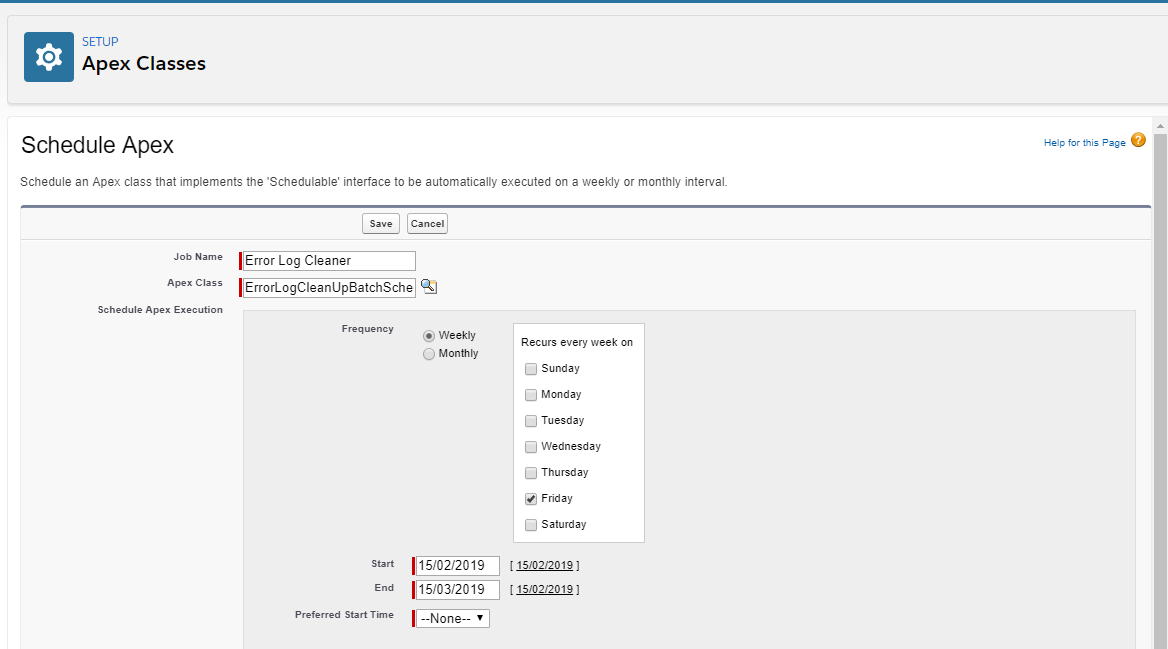
Go to Setup → Apex Classes → Schedule Apex
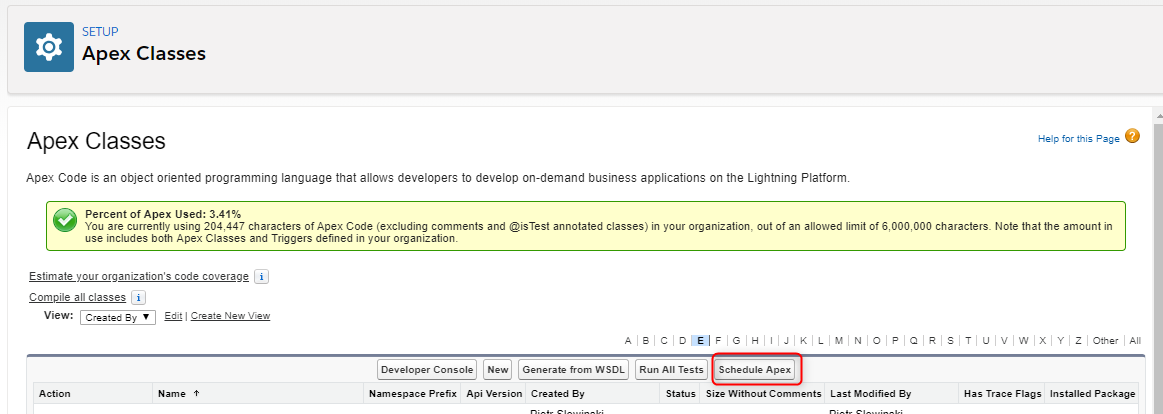
Find Apex Class named . Set the time, when job should be ran.